The Tri-speed
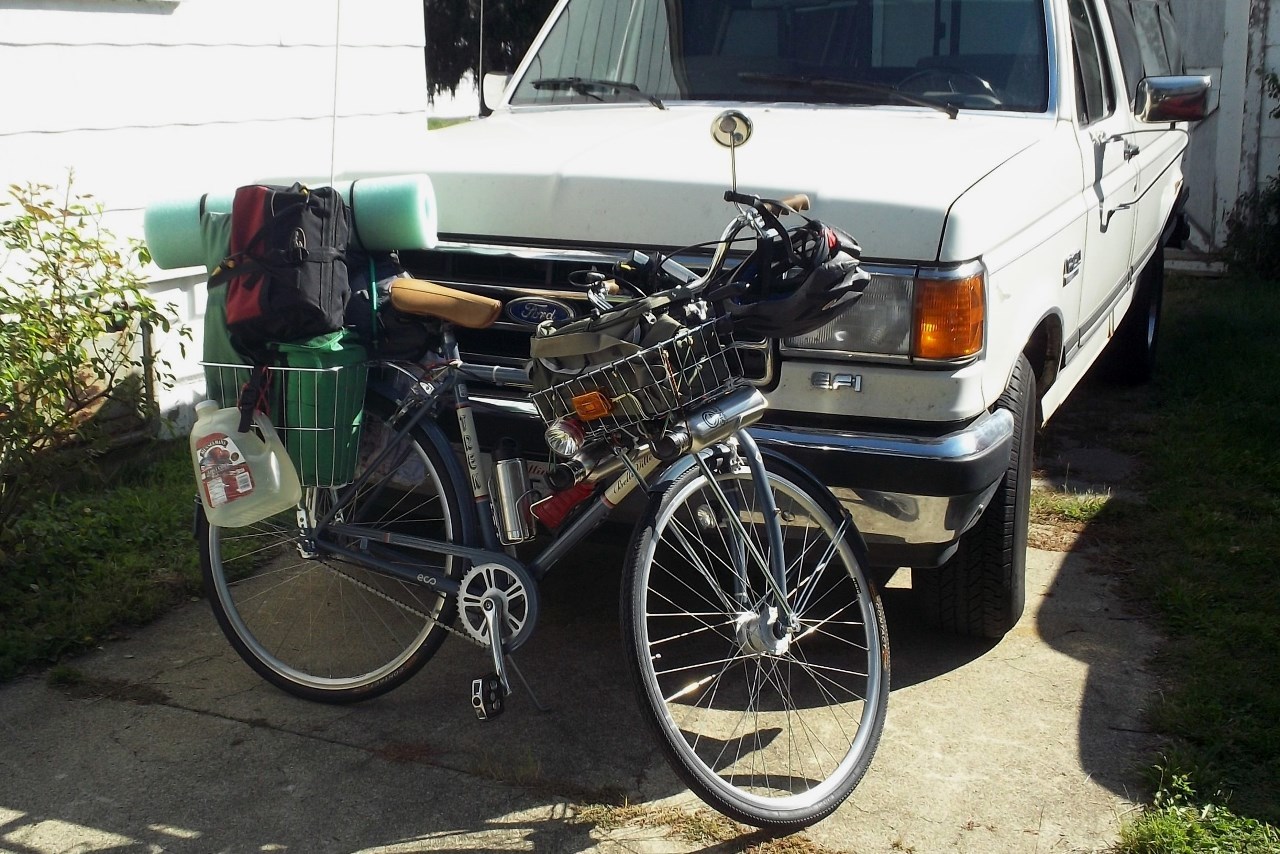
I bought a new bicycle for touring - a Trek Belleville - in May 2011. Credit goes to my friend Loren at work who suggested in October 2010 that the Belleville might be the right bike for me. (Loren patiently listens to all my touring talk, even though he’s a road biker.)

I spent most of last summer modifying it to suit me - different handlebars, shift lever, seat, pedals, tires, changed out the racks for baskets, added flashing lights, and re-wired the lighting system for battery charging from the hub dynamo. My wife says I’ve made so many changes, I shouldn’t be calling it a “Trek Belleville” anymore. However, I do believe this bike was the best choice for me - chromoly (steel) frame, 36-spoke wheels, fenders, internal three-speed rear hub, front hub dynamo with light set, and . . . it looks cool! (Sadly, Trek discontinued the Belleville last year. Mine's a 2010 model.)

Figuring out how to wire the bike to get the 6-volt, 2.4-watt hub dynamo to charge a 12-volt battery became a challenge for me. I wanted something simple. I set the bike upside-down in my basement workroom to check the dynamo output voltage with an oscilloscope. Turns out it’s an alternating current (AC) waveform. So I’d need to convert it to DC and boost the voltage. I considered several options for doing this, but then came upon the “Split-Battery Circuit” shown at this website: http://www.amphibike.org/index.cgi?page=pages/3_bikes/monocog/unregCharge . So simple! That’s what I was looking for. The website also shows a hybrid circuit design for greater charging efficiency when going above 12 mph, but how often will I be doing that? So, I’d just need to buy two 6-volt batteries instead of using the 12-volt battery I’d just purchased. (Wired in series, the two 6-volt batteries provide 12 volts.) Also, for the circuit, I found some special (Schottky type) diodes (type MBR1100) that were indicated to have a lower forward voltage drop than standard type 1N4002 diodes. After figuring out how to control all my lights through one switch, I was ready to actually start wiring. (I already had the flasher circuit designed, since it was the same as on my old bike.) Finally, in August 2012, the bike was wired.

| Heart | 0 | Comment | 0 | Link |

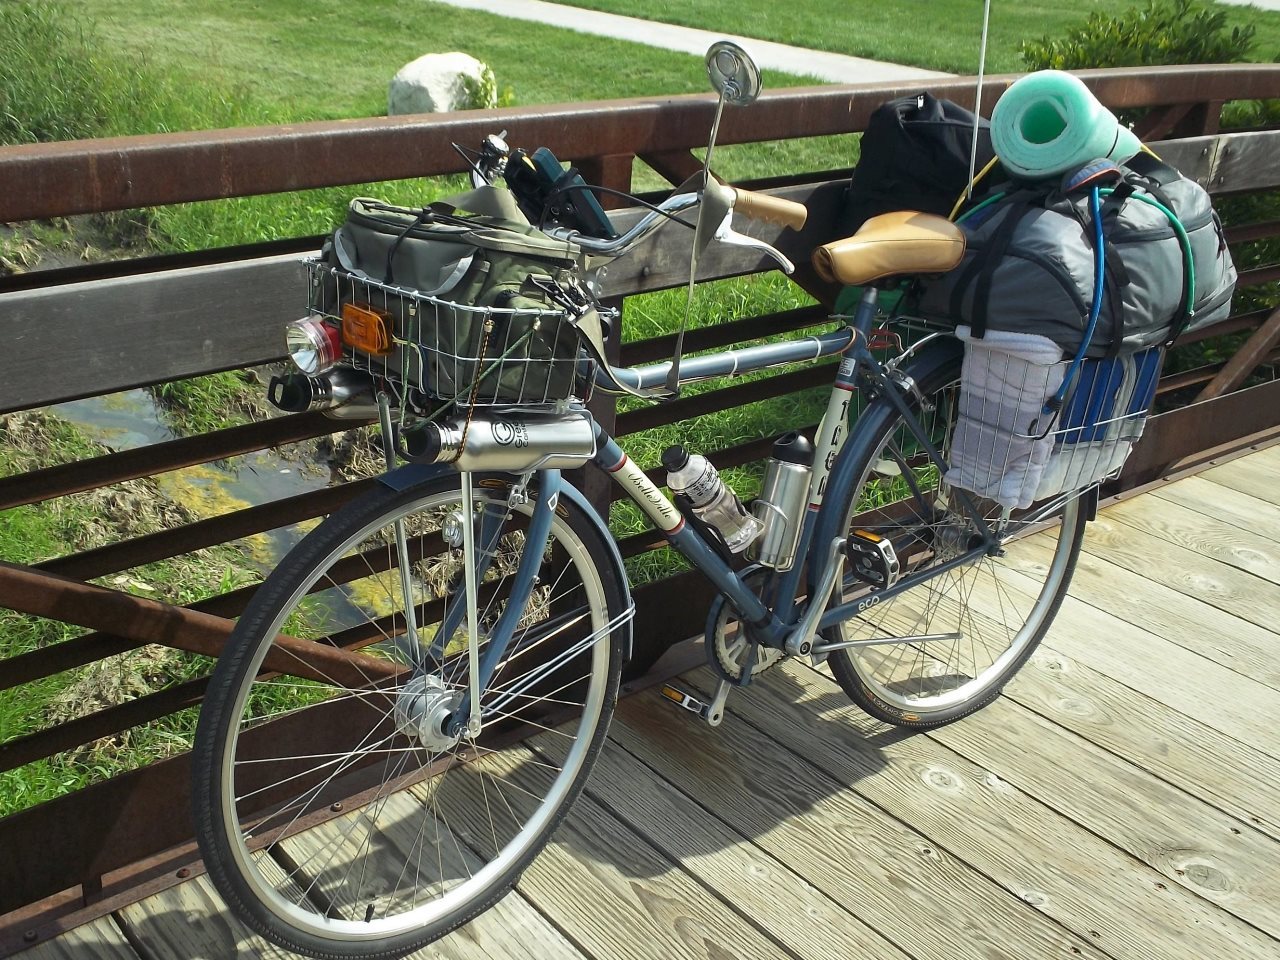
Now, for a fully-loaded test trip. I planned for an overnight trip, which I took the weekend of September 15-16, 2012, to nearby Sand Ridge State Forest in Mason County, Illinois (93 miles round trip). I packed everything I’d start out with on a long trip, and then some. What I wanted to find out was, how well the bike performed loaded, how well the battery charged from the dynamo, and how well my new insulated “Klean Kanteen” worked.
[A note: A detailed trip report for the overnight “fully-loaded test trip” outlined here is available at http://www.mjlegel.com/Blog/2012/jeff/0001.php , thanks to Michael Legel.]

| Heart | 0 | Comment | 0 | Link |


| Heart | 0 | Comment | 0 | Link |

| Heart | 0 | Comment | 0 | Link |

| Heart | 1 | Comment | 0 | Link |


This was a fun trip, and gave me a chance to get used to shifting and using hand brakes. The only issue I had during the weekend was with the kickstand - it wanted to move past its stop. Since then, I’ve bought two kickstands (a Greenfield “standard-mount” and a Greenfield SKS2-305B Stabilizer Rear-Mount). I think I’ll leave them both on. One other concern that popped into my mind over the winter was the chain, which stretched quite a bit on the test trip, and has no master link. Using advice from Loren, I purchased a KMC brand chain, which does have a master link. I also finally decided on - and purchased - the tires I’ll use for this trip: Continental Country Plus, size 700c x 37mm (37-622).
The hub dynamo did charge the battery, averaging a 1% increase in battery charge per every 2 miles, with the battery unloaded. Since the load of all the devices I plan to use is greater than the dynamo’s power output, I bought a “Battery Tender Junior” which I can use to keep the battery up when camping at places where electricity is available.
Then, this spring, I was driven by an obsession that didn’t really matter - except in my mind. I decided to measure the forward voltage drop across one of the MBR1100 diodes I had on the bike (an International Rectifier brand) and another brand (Motorola) I had on hand. The Motorola was better (lower), but I only had one! This set me off to buying and testing several brands and similar type diodes. I did find the best, as far as my testing showed - a type MBR1100 by “ON Semiconductor”. So I installed two of those. The advantage of a lower forward voltage drop is that the diode will start conducting (charging the battery) sooner each AC cycle. The reason it doesn’t really matter is that it’s the difference between (say for a 200mA charge current into a 6.3-volt battery), charging at 6.73 volts instead of at 6.82 volts - a 1.3% improvement from what I already had on the bike!

| Rate this entry's writing | Heart | 4 |
| Comment on this entry | Comment | 0 |